


1. Log in with the administrator account of your website.
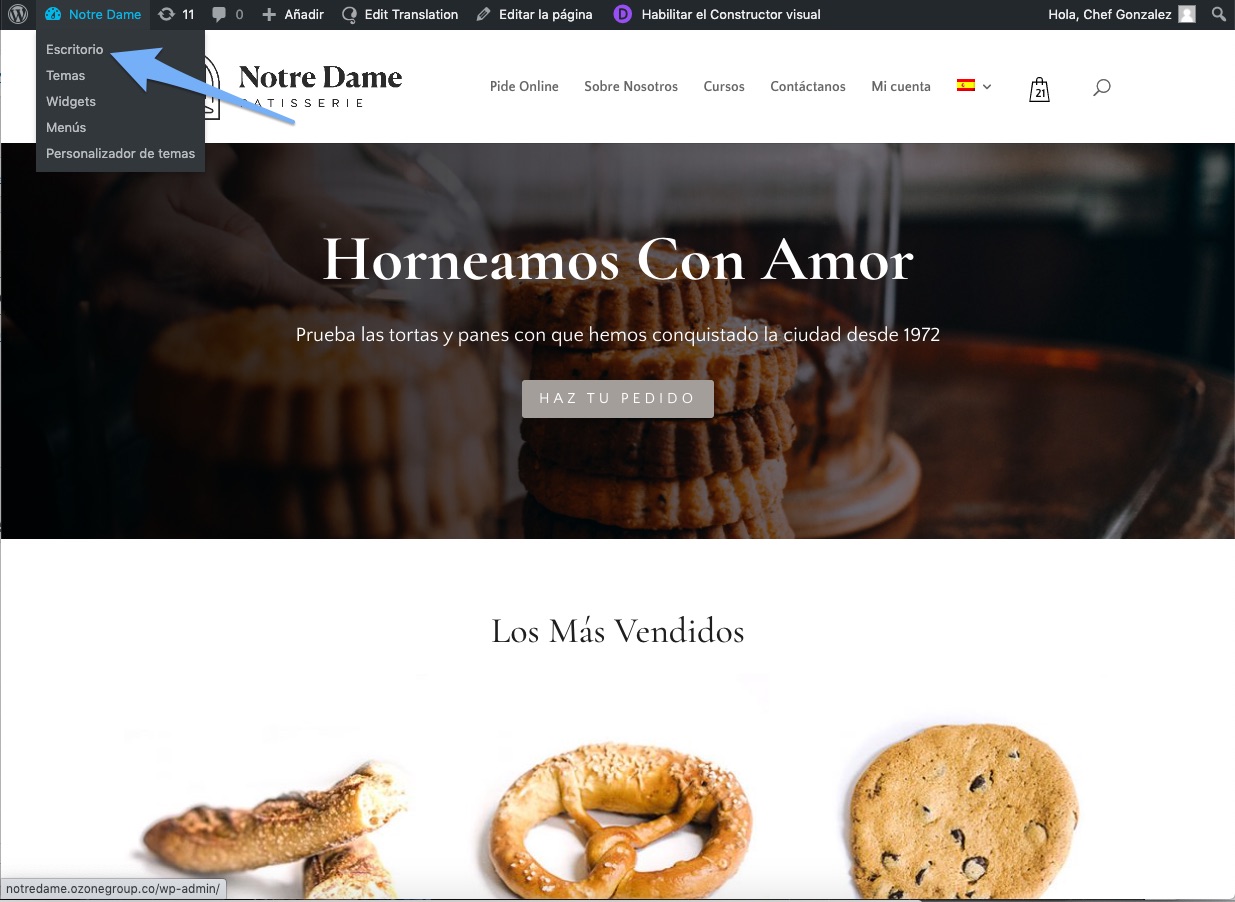
2. In the top bar, click on “Dashboard”.
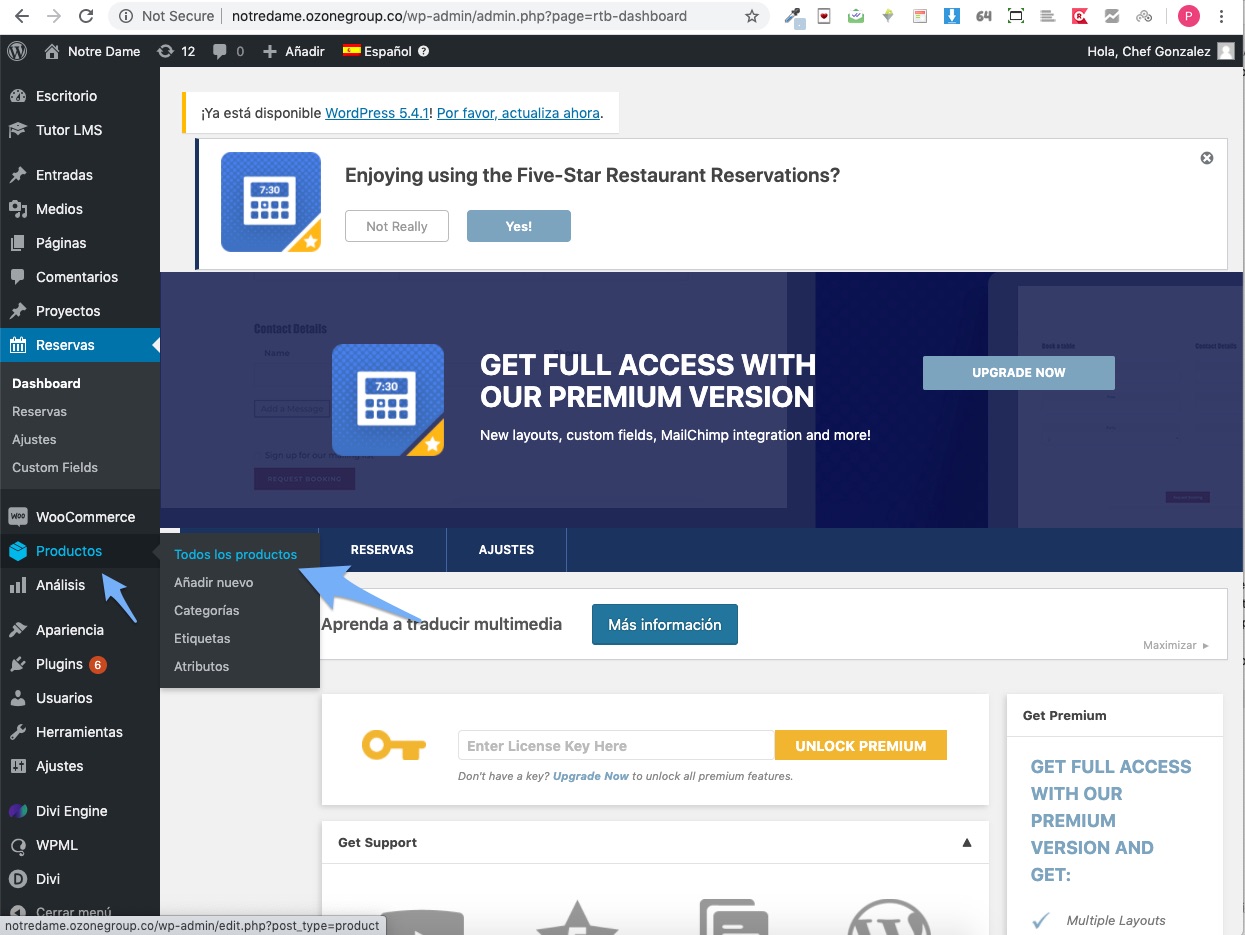
3. Next, place the mouse cursor on “Products” and then click on “All products”
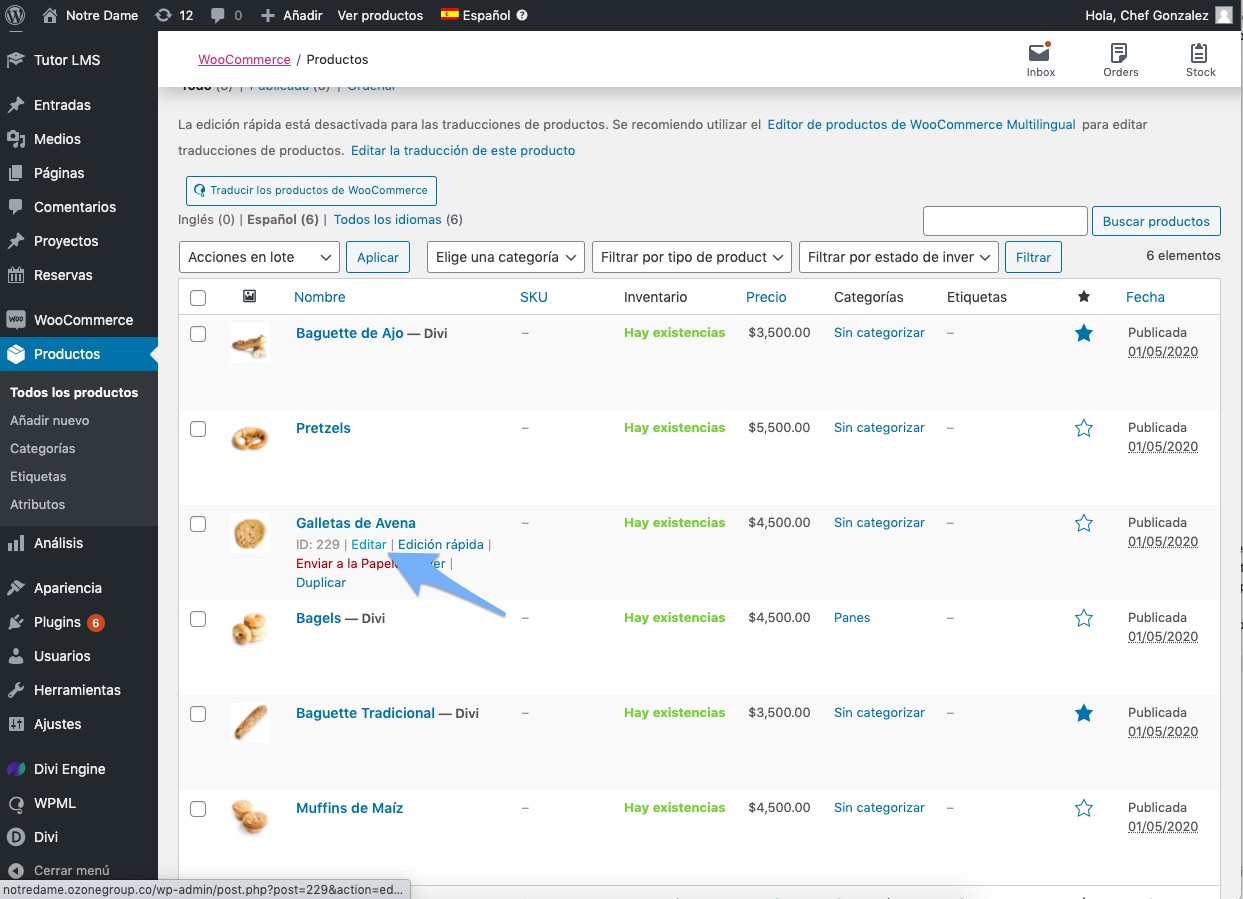
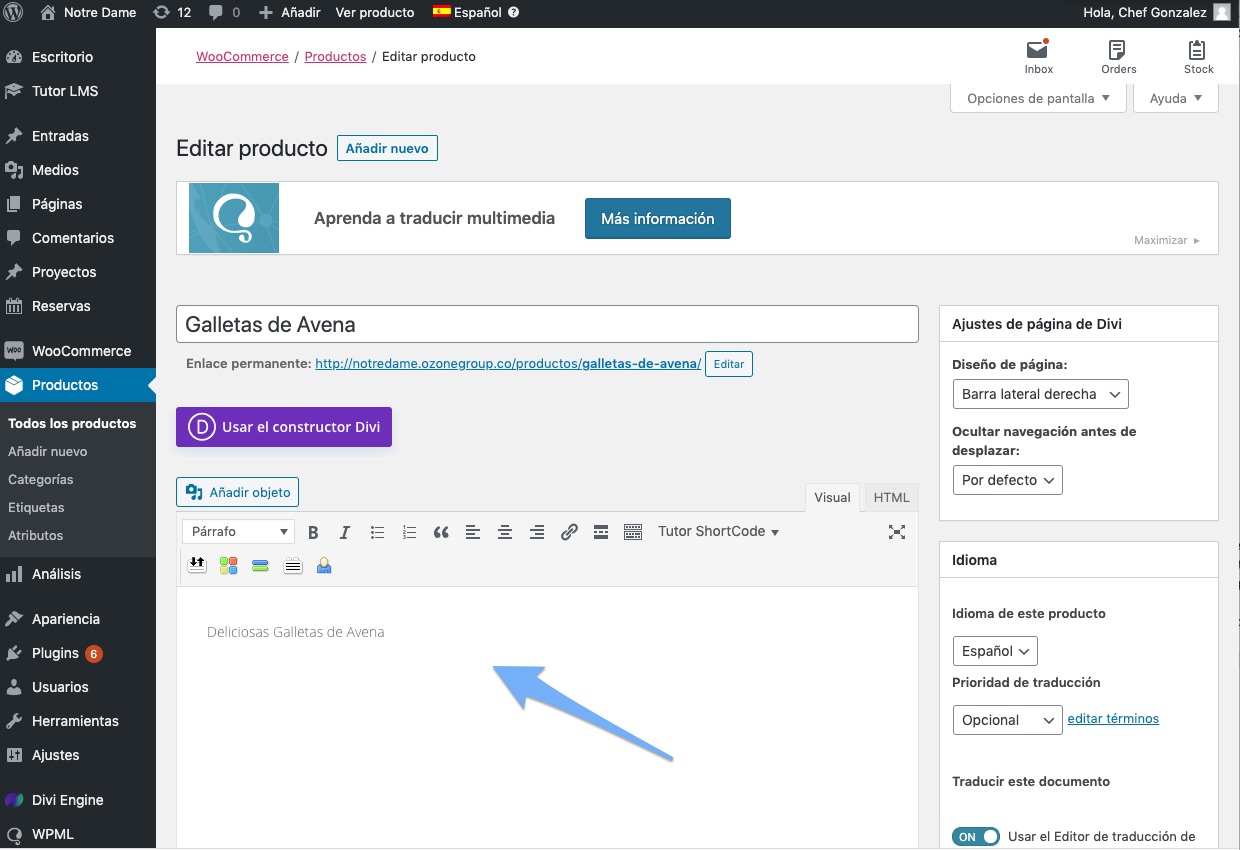
4. Position the mouse cursor over the product you want to edit and click “Edit”
5. In this view, you can edit all the information regarding the product. To edit the product description, locate the first text area below the title, and edit the content.
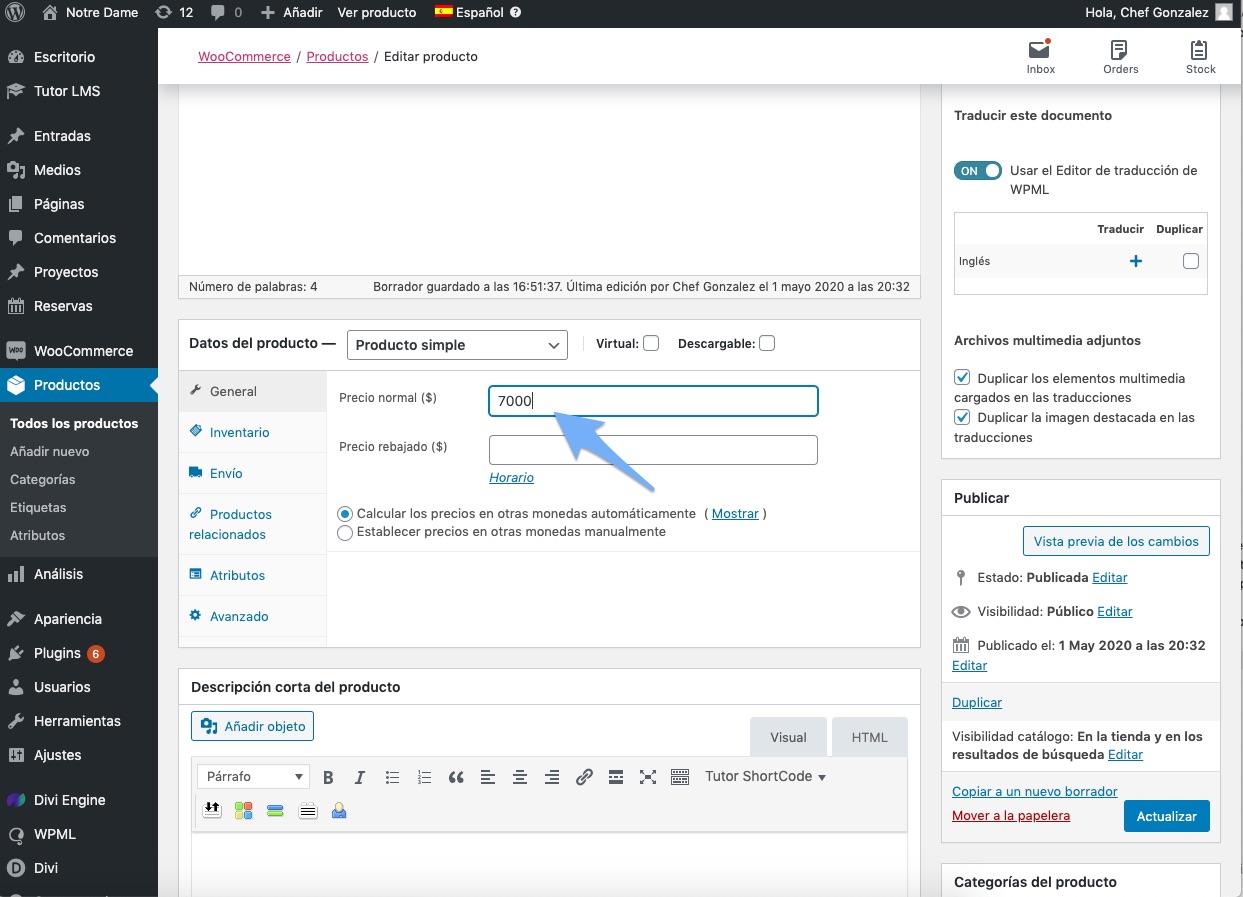
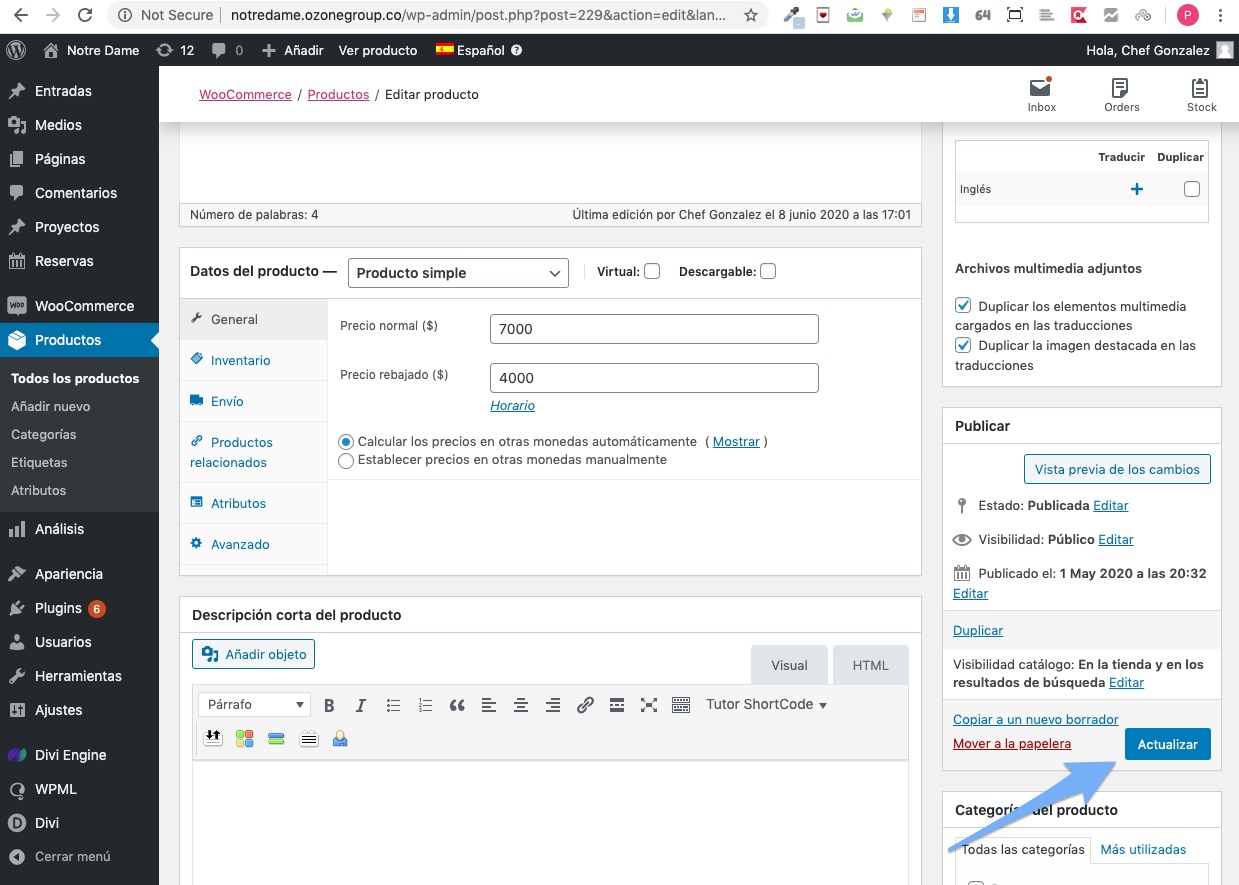
6. To edit the price go to the section “Product data” and edit the price.
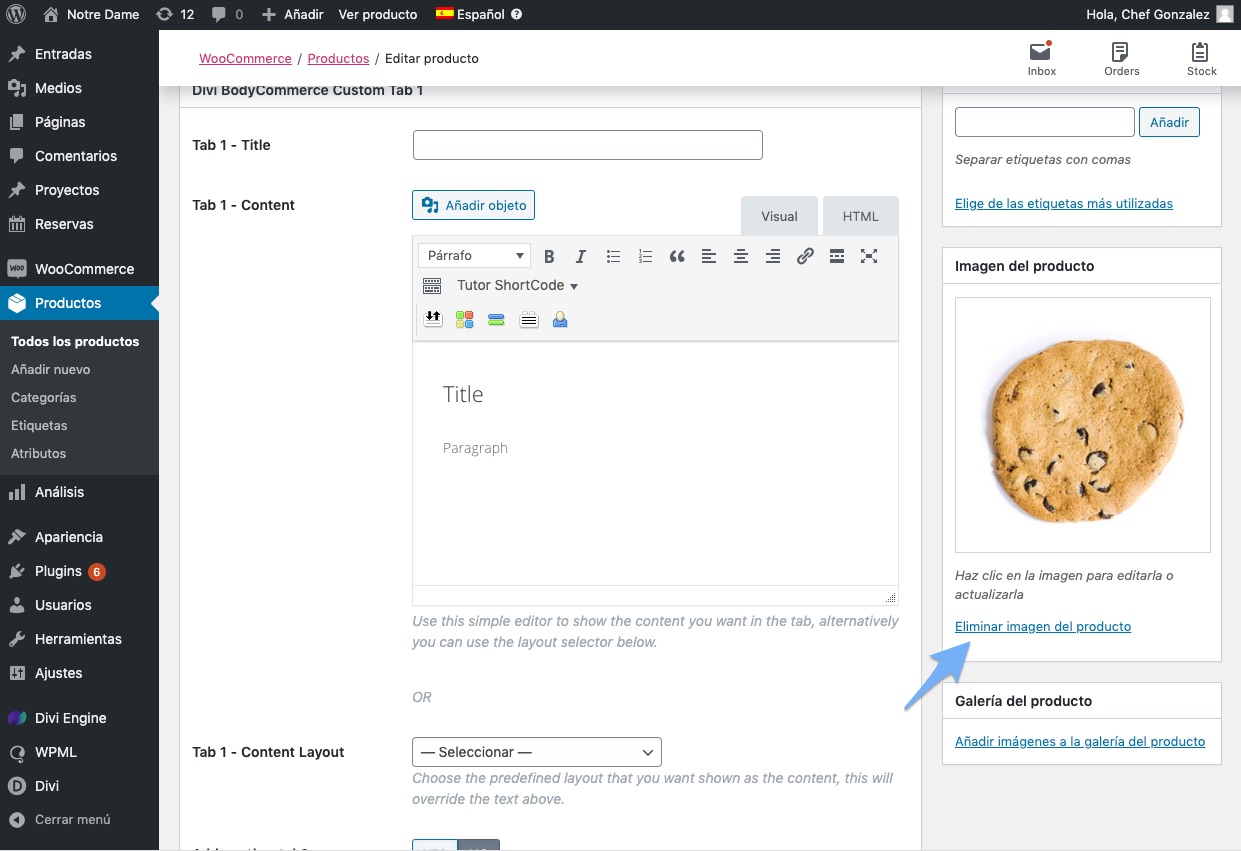
7. To edit the product image go to the “Product image” section click on “Delete product image”, then click on “Set feature image”
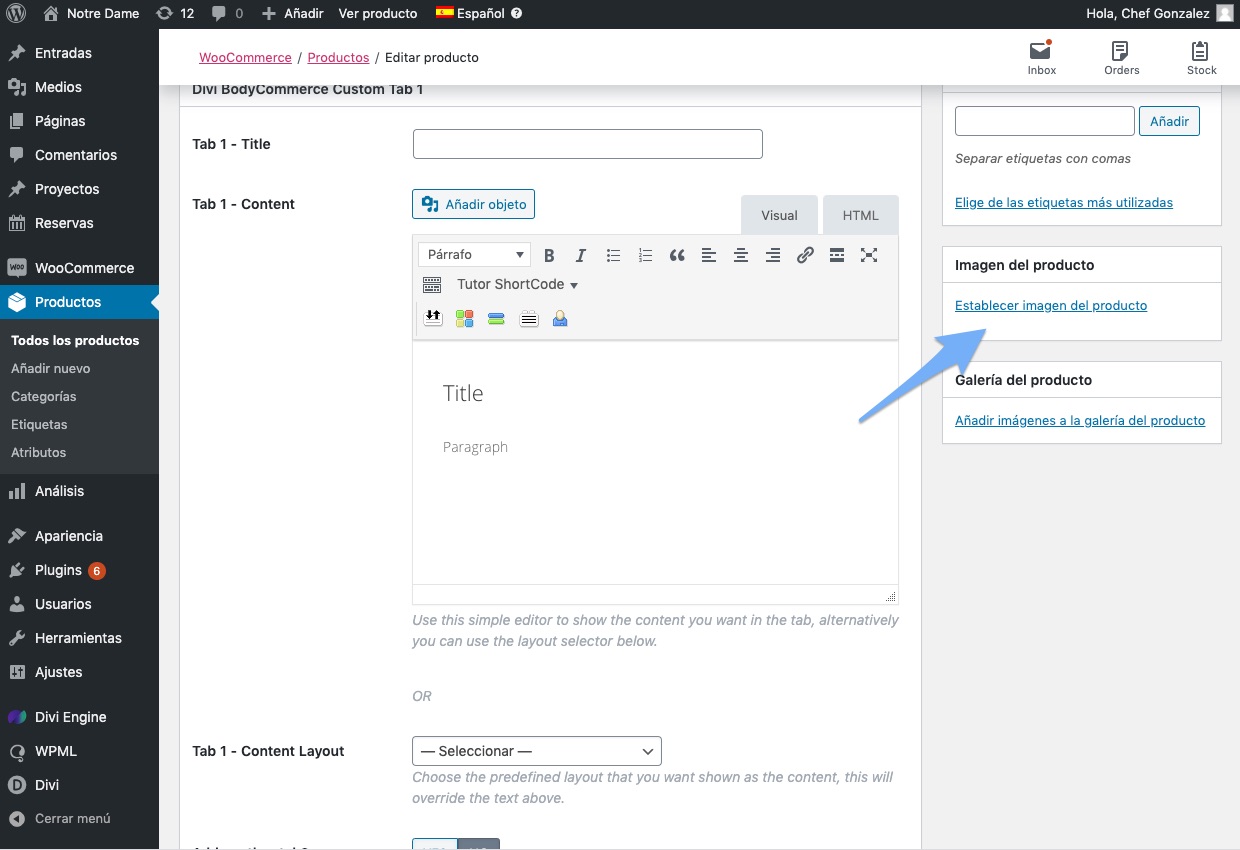
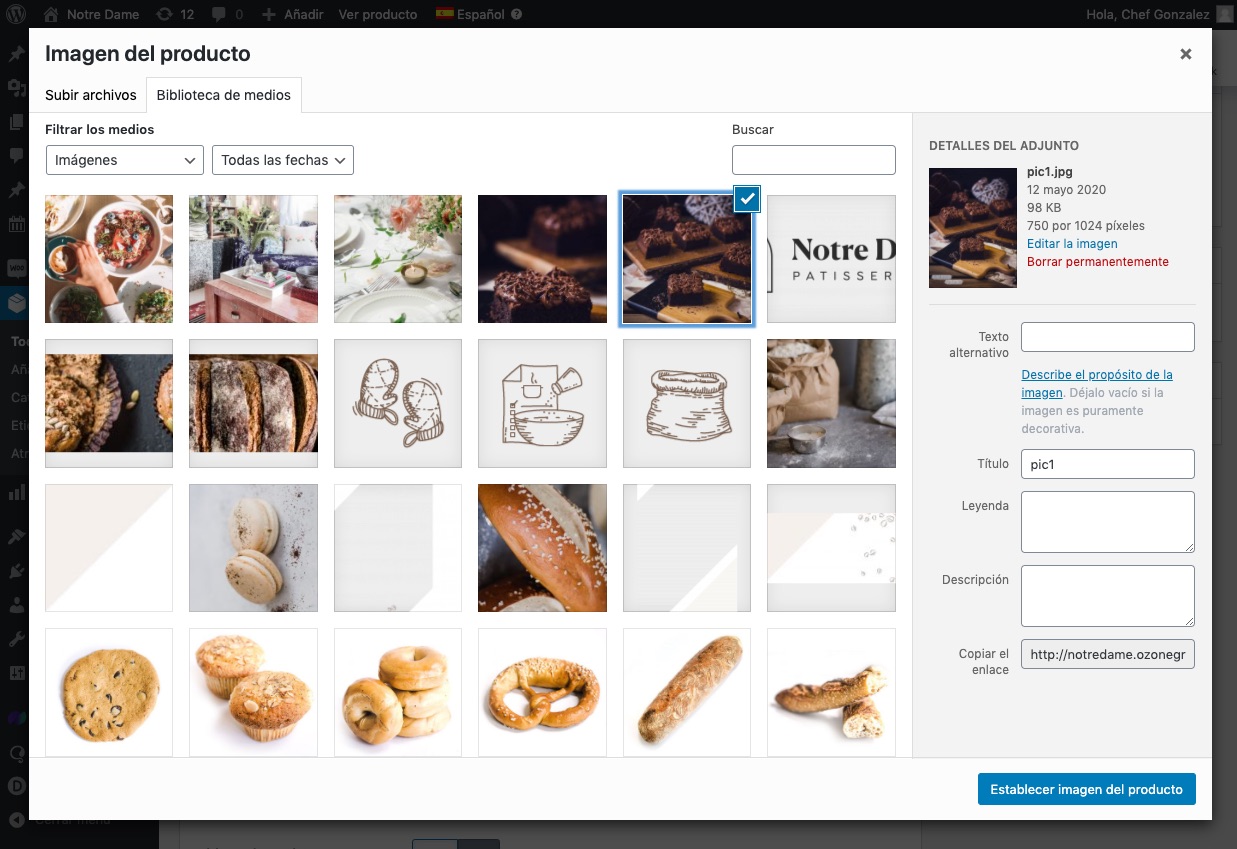
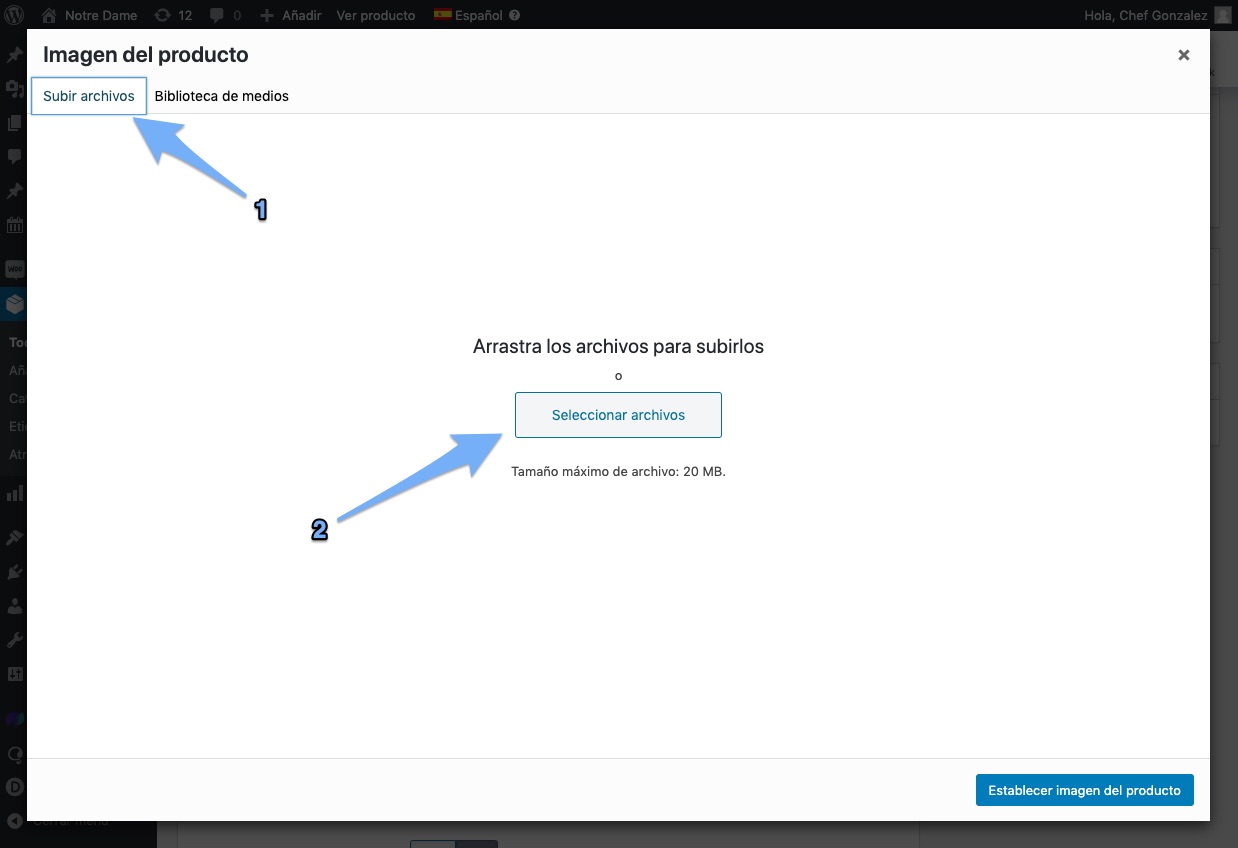
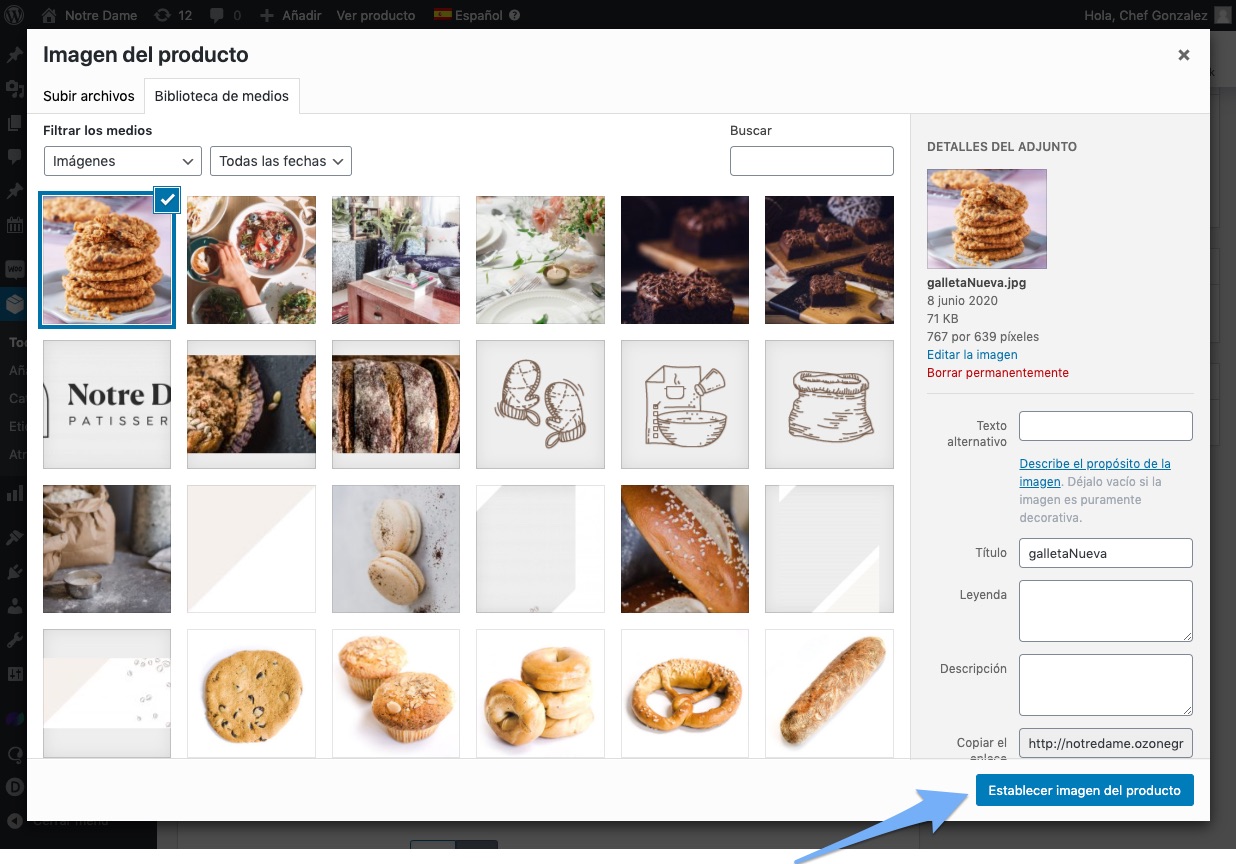
´8. In this view you can see all the images that you have already uploaded to your website, you can select any of those or upload a new one, to upload a new image click on “Upload files” and then on “Select files” and select the image on your computer. Then select the image and click “Set product image”
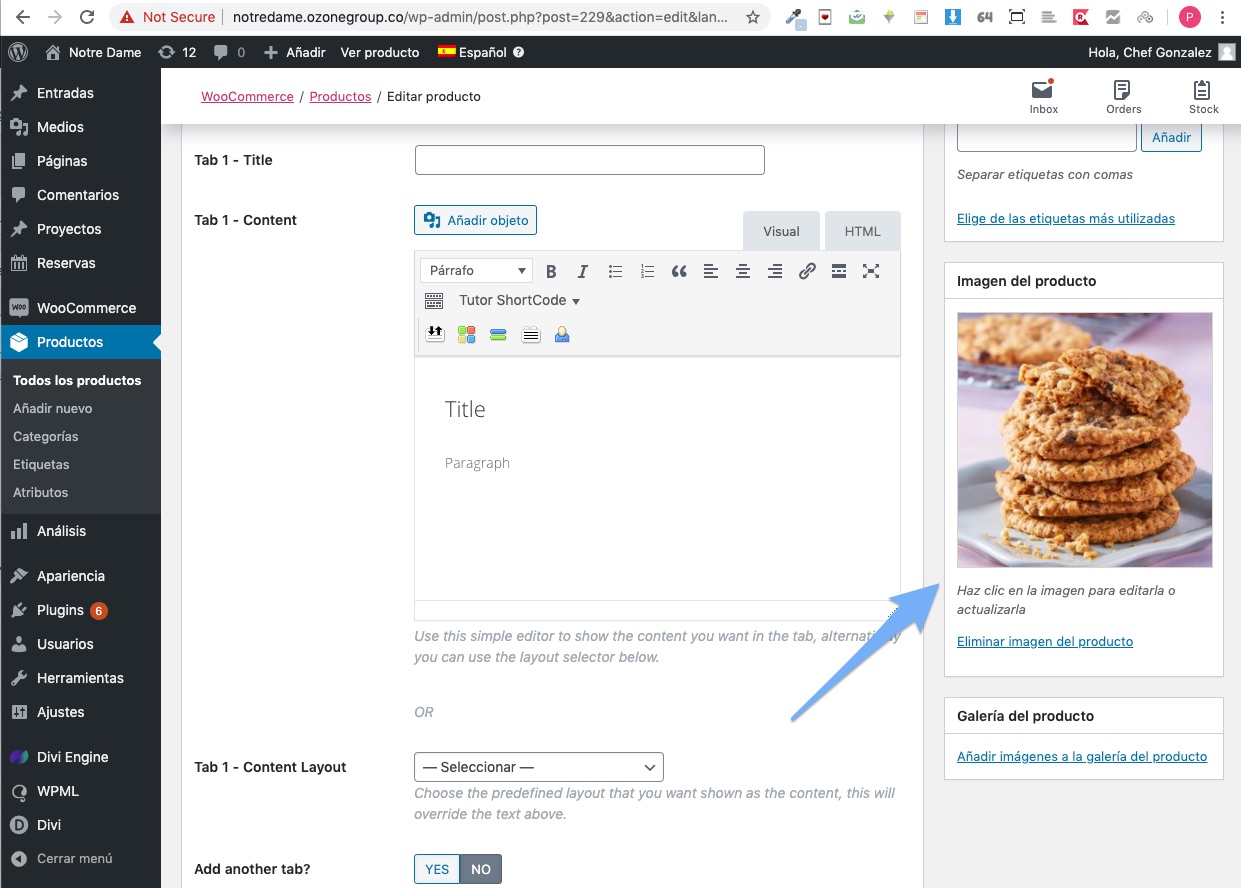
9. On the right side, you will see the image you selected.
10. You can also make use of the reduced price functionality, this will help you to boost your online sales. For this, set the normal price and then the reduced price.

11. Finally and for your changes to take effect you must click on the “Update” button found on the right sidebar.


0 Comments